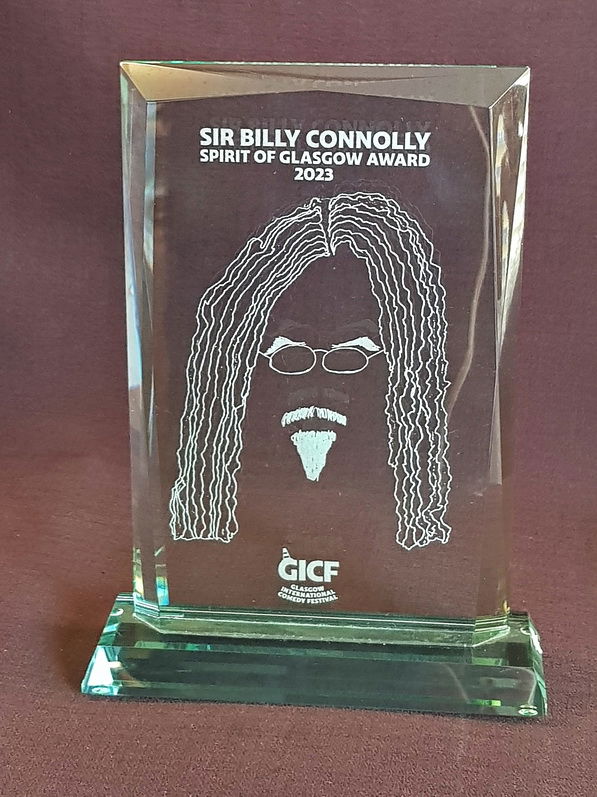
Logo Engraving Mastery with Epilog Laser: A Reflection on Awards and More

Description
Exploring the intricacies of logo engraving with Epilog laser systems, and its significance in reflecting a brand's excellence in awards and beyond.
Content
Mastering the art of logo engraving on awards and various items can significantly elevate a brand's image, offering a form of recognition that goes beyond the standard. Epilog laser systems provide the precision and versatility required for such detailing, ensuring that every engraved logo represents the brand with clarity and elegance. This article provides a comprehensive step-by-step guide on how to achieve logo engraving mastery using an Epilog laser engraving machine.
Understanding the Basics of Epilog Laser Engraving
Before diving into the logo engraving process, it's important to understand the fundamentals of laser engraving with an Epilog system. Laser engravers work by emitting a concentrated beam of light that etches or cuts through a variety of materials. This beam is directed by a computer-controlled system that follows the intricacies of your design, making it ideal for replicating the fine details of a logo.
Preparation: Design and Material Selection
Select the right material: Choose a material that best compliments the brand and is suitable for laser engraving. Common materials include acrylic, glass, wood, metal, and coated metals. Each material interacts differently with the laser, affecting the quality and appearance of the final engraving. Create or convert your logo: Ensure that the brand's logo is in a vector format such as .AI, .EPS, or .SVG. Vector formats are preferred because they allow scaling without loss of quality. If the logo is not in a vector format, you might need to use software like Adobe Illustrator to trace and convert it. Optimise your vector file: Remove any unnecessary elements and ensure that the paths are clean and closed. Pay attention to the thickness of lines and the spacing of elements, as intricate details might not engrave well if they are too fine.
Setting Up the Epilog Laser Engraver
Choose your settings: Select the appropriate speed, power, and frequency settings for the chosen material. Epilog provides a materials-based guide to help you with this step. Test these settings on a scrap piece of your material if available. Place the material: Securely position the material in the engraver. The material should be flat and stable to ensure the highest quality engraving.
Use jigs or fixtures if necessary to keep the material in place during the engraving process. Focus the laser: An Epilog laser machine has an auto-focus feature, but manual focusing might be needed occasionally.
The laser needs to be at the correct distance from the material for a crisp, precise engraving. Import your design: Use the print driver to import your logo into the engraving software. This software will allow you to position the logo exactly where you want it on the material.
Engraving the Logo
Run a test engraving: Before proceeding with the final engraving, run a test on a similar material to ensure your settings yield the expected results. Check the engraving for clarity, depth, and accuracy. Start the engraving process: Once satisfied with the test, proceed to engrave the actual material. Monitor the engraving process to ensure the machine is functioning properly and the material is not being damaged. Adjust as necessary: If the logo isn't engraved as expected, pause the machine and adjust your settings as needed. This may involve increasing power for deeper engraves or lowering speed for a darker mark.
Troubleshooting Common Issues
Inconsistent engraving depth: This could be due to an uneven material surface or incorrect focusing. Check the focus of the laser and the flatness of your material. Burn marks or discolouration: Adjust the speed and power settings if the material is burning. This is a common issue when the laser moves too slowly or with too much power. Unclear details: This might occur if the logo design is too intricate for the chosen material or engraving resolution. Simplify the design or choose a material that accommodates finer details.
Post-Processing and Quality Control
Cleaning the engraved item: After laser engraving, clean the material to remove any residue from the engraving process. This may involve wiping it down with a damp cloth or using a specific cleaning agent depending on the material. Inspecting the final product: Check the engraved logo to ensure it meets the brand's standards. Ensure that the engraving is consistent, accurate, and reflective of the brand's image.
Adding additional features: Attach any necessary components to the engraved item, such as bases or plaques. These additions should complement the engraving and enhance the overall presentation of the award. Applying finishing touches: Depending on the material, apply any finishes to protect the engraving and give it a polished look. This might include lacquer on wood or a special coating on metal to prevent tarnishing.
Above video, an iPhone engraved with the logo
Finalising the Award or Item
Wrap-Up and Presentation
Once the engraving and post-processing are completed, the final step is presenting the award or item. Careful packaging can protect the engraving during transportation and adds a professional touch. When you hand over the engraved award or item, it's not just a reflection of a job well done, but also of the distinguished brand it represents. By following these detailed steps and employing the capabilities of an Epilog laser engraving system, your brand can achieve logo engraving mastery. The end result is a sophisticated and precisely engraved logo that not only commemorates achievements but also resonates with the core identity of the brand.


